
Are you new to 3D printing and feeling overwhelmed by the sheer number of software options available? You’re not alone. Many beginners struggle to navigate the complex world of digital models, G-code files, and the various stages of the 3D printing process.
The problem is, choosing the wrong software can lead to frustrating failures, wasted materials, and subpar prints. Without the right tools, you might find yourself unable to bring your creative visions to life or achieve the level of customization and control you desire.
Fortunately, there’s a solution. By understanding the three main categories of 3D printing software – slicing, design, and print monitoring – you can make informed decisions and set yourself up for success. Each type plays a crucial role in transforming your ideas into tangible objects.
In this ultimate guide, we’ll explore the best 3D printing software for beginners, breaking down the options for each stage of the process. Whether you’re looking to create stunning digital models, generate precise G-code files, or monitor your prints in real-time, we’ve got you covered. Get ready to unlock the full potential of your 3D printer and take your projects to the next level!
Table of Contents
- 1 Summary of how you can get started with 3D printing software as a complete beginner
- 2 Understanding 3D Printing Software
- 3 Key Features of 3D Printing Software
- 4 Popular 3D Printing Software for Beginners
- 5 Choosing the Right 3D Printing Software
- 6 Getting Started with 3D Printing Software
- 7 Troubleshooting and Maintenance
- 8 Community and Learning Resources
- 9 Conclusion
Summary of how you can get started with 3D printing software as a complete beginner
- Choose beginner-friendly software (e.g., Cura)
- Install and configure software
- Learn basic interface navigation
- Start with default settings
- Gradually explore advanced features
- Use online tutorials/communities
- Practice troubleshooting common issues
- Experiment with different print settings
- Join 3D printing forums
- Stay patient and persistent
Understanding 3D Printing Software
Ever wondered how those intricate digital designs become high-quality 3D prints?
The secret lies in the software powering your 3D printer. These digital tools are the unsung heroes behind every successful print, offering advanced precision and an optimized workflow.
But what exactly are 3D printing softwares, and why are they crucial for your creative journey? Let’s dive into the world of digital design and fabrication to uncover how these powerful programs transform your ideas into tangible objects with astonishing accuracy.
What is 3D printing software?
3D printing software is the digital bridge between your imagination and physical reality. These powerful tools transform digital models into tangible objects, guiding your 3D printer every step of the way. At its core, this software converts complex 3D designs into a language your printer understands – G-code.
Think of it as a translator, turning your creative vision into precise instructions for your printer. But it’s not just about conversion; these programs offer unprecedented levels of customization and control. From tweaking intricate details to adjusting print settings, 3D printing software empowers you to fine-tune every aspect of your project. Whether you’re a hobbyist or a professional, understanding these digital tools lays a solid foundation for your 3D printing journey.
Types of 3D printing software
The world of 3D printing software is diverse and exciting, with each type serving a unique purpose in bringing your ideas to life. There are three main categories that work together to create a seamless printing experience.
- First, we have Slicing software, which takes your 3D model and cuts it into thin layers, preparing it for printing.
- Next, Design software allows you to create or modify digital models, giving shape to your imagination.
- Finally, Print monitoring software keeps an eye on your printer in real-time, ensuring everything runs smoothly.
Understanding these different types of software helps you choose the right tools for each stage of your project. It’s this combination of specialized software that makes 3D printing such a versatile and powerful technology.
Importance of 3D printing software
The significance of 3D printing software cannot be overstated in the quest for high-quality 3D prints. These digital tools are the backbone of the entire printing process, offering advanced precision that transforms basic ideas into complex, functional objects.
By allowing you to fine-tune every aspect of your print, from layer height to infill density, 3D printing software ensures that your final product meets your exact specifications.
Moreover, it creates a streamlined 3D printing process, reducing waste and saving time. Without robust software, even the most advanced printer would struggle to produce accurate results.
In essence, 3D printing software is what turns a machine into a creator, enabling you to push the boundaries of what’s possible in additive manufacturing.
Key Features of 3D Printing Software
When selecting 3D printing software, several crucial features can make or break your experience. Print control, compatibility with various file formats and printers, and security measures to protect your designs are just the beginning.
Let’s explore the essential features that will elevate your 3D printing game and help you choose the perfect software for your needs.
Remote printer control and monitoring
Imagine being able to oversee your 3D printing projects from anywhere in the world. That’s the power of remote printer control and monitoring.
This feature lets you monitor remotely, keeping a watchful eye on your print job no matter where you are. With real-time options at your fingertips, you can make crucial decisions on the fly.
Need to pause the print because you spotted an issue? No problem. Want to resume after making adjustments? Just a click away. And if things aren’t going as planned, you can even cancel the print job entirely, saving time and materials.
This level of control transforms your 3D printing experience, offering peace of mind and flexibility that was once unimaginable in the world of additive manufacturing.
G-code file management
At the heart of every 3D print lies the G-code, the language that tells your printer exactly what to do. G-code file management is a crucial feature that puts you in the driver’s seat of your printing process. It allows you to not only view but also customize your G-code, giving you unprecedented control over every aspect of your print.
Want to adjust the print speed for a specific layer? You can do that. Need to modify the infill pattern? It’s at your fingertips.
The best software supports various file formats, ensuring compatibility with different printers and design tools.
This flexibility to edit and fine-tune your G-code means you can optimize your prints for better quality, faster printing times, or unique effects that set your creations apart.
Print job management
Efficient print job management is the secret weapon of productive 3D printing enthusiasts. This feature transforms your printer from a single-task machine into a powerhouse of productivity.
With advanced queuing capabilities, you can line up multiple print jobs, ensuring your printer is always working on your next project. But it’s not just about volume – it’s about smart printing.
Prioritizing print jobs allows you to fast-track urgent projects while less time-sensitive ones wait their turn. And for those with multiple printers or high-volume needs, the ability to support multiple print jobs simultaneously is a game-changer. It’s like having a personal assistant for your 3D printer, optimizing your workflow and maximizing output.
Whether you’re a hobbyist juggling personal projects or a professional managing client orders, print job management keeps your 3D printing operation running smoothly and efficiently.
Plugin system
Unlock a world of possibilities with a robust plugin system in your 3D printing software. This feature is like having a Swiss Army knife for your digital workshop, allowing you to extend functionality beyond the base program.
Whether you need specialized tools for intricate designs or want to streamline your workflow, there’s likely a plugin for that. The beauty lies in the customization options – you can tailor your software environment to fit your unique needs.
Even better, many 3D printing communities thrive on sharing knowledge and resources, resulting in a wealth of community-developed plugins. These user-created add-ons often address niche needs or introduce innovative features, keeping your toolkit fresh and relevant.
With a plugin system, your 3D printing software evolves with you, adapting to new challenges and expanding your creative horizons.
Slicing integration
Seamless slicing integration is the secret sauce that elevates your 3D printing workflow from good to great. This feature bridges the gap between your 3D model and the printer-ready instructions, offering a smooth transition that saves time and reduces errors.
With integrated slicing, you can effortlessly customize your print settings without jumping between different programs.
Want to adjust layer height, infill density, or support structures? It’s all at your fingertips within a unified interface. The best part? Many software solutions support various slicing options, allowing you to choose the one that best fits your needs or stick with your favorite.
This flexibility ensures that whether you’re a beginner looking for user-friendly presets or an expert seeking granular control, you’ll find the perfect balance of efficiency and customization in your slicing process.
Advanced printer control
Take command of your 3D printer like never before with advanced printer control features. This is where your software transforms from a simple interface to a powerful command center for your 3D printing operations.
At your fingertips are precise controls for critical parameters like temperature management – crucial for achieving the perfect print consistency.
Need to make on-the-fly adjustments to your extruder? No problem. These advanced options let you fine-tune extrusion rates, retraction settings, and more, ensuring optimal filament flow for flawless prints. The best part? Many software solutions are designed to support various 3D printer models, offering a universal control platform for your workshop.
Whether you’re working with a budget-friendly desktop printer or a high-end industrial machine, advanced printer control puts you in the driver’s seat, allowing you to push the boundaries of what’s possible in 3D printing.
Notification and alerts
Stay in the loop with your 3D printing projects through robust notification and alert systems. These features act as your digital assistant, keeping you informed about your print job status without the need for constant manual checks.
Imagine receiving a notification when your print is complete, or an alert if an issue arises mid-print.
The best software offers customizable notification options, allowing you to tailor the information you receive to your specific needs. Whether you prefer email updates, SMS alerts, or in-app notifications, you can choose the method that fits seamlessly into your workflow.
This constant flow of information ensures you’re always on top of your projects, ready to respond quickly to any changes or completion, ultimately saving time and reducing print failures.
Access control and security
In the digital age, protecting your 3D printing projects is as crucial as creating them. Access control and security features in 3D printing software provide a fortress for your designs and data.
User authentication ensures that only authorized individuals can access your projects, while granular authorization controls let you decide who can view, edit, or print specific files.
But it doesn’t stop there. Secure data storage protects your intellectual property from unauthorized access, while encrypted data transmission safeguards your designs as they travel between devices or to your printer.
These security measures not only protect your work but also build trust when collaborating with clients or team members. With robust access control and security features, you can focus on innovation, knowing your digital assets are well-protected.
Detailed analytics and logs
Harness the power of data with detailed analytics and logs in your 3D printing software.
This feature turns your printing history into a goldmine of insights, helping you optimize your processes and improve outcomes. Comprehensive tracking of print job history allows you to review past projects, analyze successes, and learn from failures.
Dive deep into statistics like print times, material usage, and success rates to identify trends and areas for improvement. The ability to export and import this data is a game-changer, enabling you to back up your printing records or transfer them between devices.
Whether you’re a hobbyist looking to refine your skills or a professional aiming to maximize efficiency, these analytical tools provide the insights you need to take your 3D printing to the next level.
Compatibility and support
In the diverse world of 3D printing, compatibility and support are the unsung heroes that keep your creative process flowing smoothly.
The best software offers a wide range of options, ensuring compatibility with various 3D printer models – from entry-level desktop printers to industrial-grade machines. But it doesn’t stop at hardware. Look for software that plays well with different operating systems, whether you’re a Windows enthusiast, a Mac aficionado, or a Linux guru. This flexibility allows you to work on your preferred platform without compromise.
Equally important is the level of support provided. Robust customer support can be a lifesaver when you encounter challenges, while active community resources offer a wealth of knowledge and peer-to-peer assistance.
With strong compatibility and support, you’re not just buying software; you’re joining an ecosystem that empowers your 3D printing journey, no matter where it takes you.
Popular 3D Printing Software for Beginners
Embarking on your 3D printing journey?
The right software can make all the difference. For beginners, user-friendly interfaces and efficient slicing capabilities are crucial.
Let’s explore some popular options that strike the perfect balance between functionality and ease of use. We’ll compare their features, evaluate their strengths, and help you find the ideal software to kickstart your 3D printing adventures.
Overview of popular software options
As you dive into the world of 3D printing, you’ll quickly encounter a trio of names that dominate the software landscape: Cura, Simplify3D, and OctoPrint. Each serves a unique role in your 3D printing workflow.
- Cura, developed by Ultimaker, is a go-to slicing software for many beginners and professionals alike. It’s known for its user-friendly interface and powerful slicing capabilities.
- Simplify3D, on the other hand, is an advanced slicing software that offers more granular control over print settings, making it a favorite among experienced users seeking to fine-tune their prints.
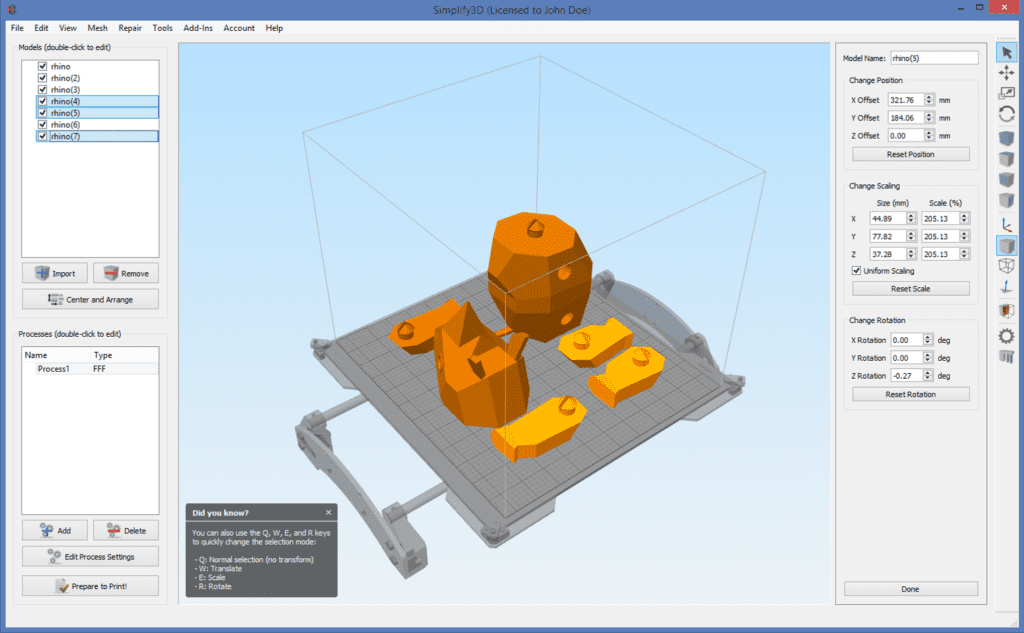
Simplify3D Interface (Source: 3D Start Point)
- Rounding out the trio is OctoPrint, a web-based interface that revolutionizes how you interact with your printer. It allows you to control and monitor your printer remotely, adding a layer of convenience to your printing process.
Understanding these options is crucial as you build your 3D printing toolkit, each offering unique features to enhance your creative journey.
Comparison of features and functionality
When it comes to 3D printing software, Cura, Simplify3D, and OctoPrint each bring unique strengths to the table.
- Cura shines with its intuitive interface and extensive library of pre-configured printer profiles, making it an excellent choice for beginners. Its adaptive layering and custom support structures offer a balance of simplicity and advanced features.
- Simplify3D, while carrying a steeper learning curve, provides unparalleled control over print settings. Its multi-process feature allows for different settings within the same print, ideal for complex projects.
- OctoPrint, unlike the others, focuses on print management rather than slicing. It excels in remote monitoring and control, with its plugin system offering endless customization options. For beginners, Cura’s user-friendliness often makes it the go-to choice, while those seeking more control might gravitate towards Simplify3D. OctoPrint, compatible with both, adds a layer of convenience to whichever slicer you choose, making it a valuable addition to any 3D printing setup.
Choosing the Right 3D Printing Software
Selecting the perfect 3D printing software can be daunting, especially for beginners. The key lies in balancing your needs with the software’s capabilities.
Consider factors like user interface, essential features, and cost when making your decision. Let’s explore a step-by-step guide to help you navigate these choices and find the ideal software to kickstart your 3D printing journey.
Factors to consider when selecting software
Choosing the right 3D printing software is like finding the perfect tool for your creative workshop.
- Start by examining the user interface – as a beginner, you’ll want software that’s intuitive and easy to navigate.
- Next, delve into the features offered. Look for essential functions like robust slicing capabilities, support generation, and print preview. But don’t get dazzled by a long list of advanced features you might not need yet.
- Compatibility is crucial; ensure the software works with your printer model and operating system.
- Don’t forget about customer support – responsive help can be a lifesaver when you’re learning.
- Finally, consider the pricing structure. While some excellent options are free, paid software often offers more advanced features. Weigh the cost against the value it brings to your projects.
Remember, the best software for you balances user-friendliness, functionality, and affordability to match your current skills and future ambitions.
Evaluating software for your specific needs
Finding the perfect 3D printing software starts with a clear understanding of your needs and goals. Are you a hobbyist looking to create simple models, or do you have aspirations for complex, professional-grade prints?
Once you’ve outlined your objectives, it’s time to evaluate how different software options align with these goals. Consider creating a checklist of must-have features and nice-to-haves. This will help you prioritize what’s truly important in your decision-making process.
Don’t overlook the power of user reviews and ratings – they can provide valuable insights into real-world performance and potential challenges. Look for reviews from users with similar experience levels and project types to your own.
Remember, the software that’s perfect for one user might not be ideal for another. By carefully assessing your unique needs and thoroughly researching your options, you’ll be well-equipped to choose software that not only meets your current requirements but also has room to grow with your skills.
Getting Started with 3D Printing Software
Ready to dive into the world of 3D printing software? Don’t worry, we’ve got you covered.
From initial setup to navigating your chosen program, this guide will walk you through the essentials. We’ll share practical tips to help you hit the ground running and avoid common pitfalls.
Let’s turn those digital dreams into tangible realities!
Installation and setup
Embarking on your 3D printing journey starts with installing and setting up your chosen software.
- Begin by downloading the latest version from the official website to ensure you have the most up-to-date features and security patches. The installation process is typically straightforward – just follow the on-screen prompts.
- Once installed, launch the software and prepare for initial configuration. This is where you’ll input crucial details about your specific 3D printer model, filament type, and nozzle size. Don’t worry if you’re unsure about some settings; most software comes with default configurations that work well for beginners. As you grow more comfortable, you can dive into customizing preferences like layer height, print speed, and infill density.
Remember, the key to a smooth setup is taking your time and referring to the user manual or online resources if you encounter any hiccups.
Mastering the interface of your 3D printing software is like learning the controls of a new vehicle – it might seem daunting at first, but soon it’ll become second nature.
Most software layouts are designed with user-friendliness in mind, typically featuring a large central area for your 3D model and surrounding toolbars for various functions.
Familiarize yourself with basic features like model import, scaling, and rotation – these will be your bread and butter.
Take time to explore the software’s functionality, from simple operations like moving objects to more advanced features like support generation. Don’t be afraid to click around and discover different options in the menus. Many programs offer tooltips or help buttons that explain each function.
Remember, the goal is to become comfortable navigating the software, so you can focus on bringing your creative ideas to life. With practice, you’ll find yourself effortlessly zipping through menus and applying complex adjustments in no time.
Tips for beginners
As you embark on your 3D printing software journey, a few key tips can help smooth your path.
- First, don’t rush into complex customizations right away. Start with the default settings and gradually tweak them as you understand their impact on your prints.
- Take advantage of presets for common materials – they’re excellent starting points.
- When you’re ready to dive deeper, experiment with one setting at a time to truly understand its effect.
- Troubleshooting is an inevitable part of the learning process, so don’t get discouraged. If you encounter issues, consult the software’s documentation or community forums – chances are, someone else has faced and solved the same problem.
- Remember to regularly update your software to access new features and bug fixes. Lastly, save your successful print profiles; they’ll be invaluable as you tackle more complex projects.
With patience and persistence, you’ll soon find yourself navigating your 3D printing software with confidence, turning your digital designs into tangible realities.
Troubleshooting and Maintenance
Even the best 3D printing software can encounter hiccups. Don’t let these issues derail your creative process!
In this section, we’ll explore common software problems and their solutions, ensuring your 3D printing journey stays smooth. From simple fixes to more complex troubleshooting, we’ll arm you with the knowledge to keep your software running optimally.
Let’s dive into maintaining your digital toolbox!
Common issues and solutions
Every 3D printing enthusiast encounters software hiccups along their journey. Don’t worry – most issues have straightforward solutions.
- One common problem is slicing errors, which can often be resolved by adjusting model orientation or repairing the STL file. If you’re facing unexpected print results, double-check your slicer settings – a misplaced decimal in layer height can wreak havoc!
- Software crashes might seem daunting, but they’re often fixed by updating to the latest version or clearing your cache.
- For those frustrating moments when your model won’t stick to the bed in the slicer preview, try tweaking your first layer settings or adding a brim.
Remember, the 3D printing community is vast and supportive – if you’re stumped, forums and user groups are treasure troves of troubleshooting wisdom.
By familiarizing yourself with these common issues and their solutions, you’ll be well-equipped to tackle any software challenge that comes your way.
Diagnostic tools and techniques
When faced with persistent software issues, it’s time to pull out the big guns – diagnostic tools and advanced troubleshooting techniques.
Many 3D printing software suites come with built-in diagnostic features. For instance, Cura offers a “Prepare” function that checks your model for potential printing issues before you even hit slice.
Learn to read and interpret error logs – they’re like breadcrumb trails leading to the root of the problem.
For more complex issues, consider using third-party mesh analysis tools to identify and fix non-manifold edges or inverted normals in your 3D models.
Don’t underestimate the power of the scientific method in troubleshooting – isolate variables and test them one at a time to pinpoint the exact cause of an issue. Advanced users might even dive into command-line interfaces for more granular control and debugging.
Remember, the goal of these diagnostic tools and techniques isn’t just to solve the immediate problem, but to deepen your understanding of the software, ultimately making you a more proficient 3D printing enthusiast.
Community and Learning Resources
Embarking on your 3D printing journey doesn’t mean going it alone. A wealth of knowledge awaits in forums, online communities, and tutorials. These resources are invaluable for beginners, offering support, inspiration, and solutions to common challenges.
Let’s explore how to tap into this collective wisdom, accelerating your learning and enhancing your 3D printing skills.
Ready to connect and grow?
Online forums and communities
Dive into the vibrant world of online forums and communities to supercharge your 3D printing journey. These digital gathering places are goldmines of knowledge, where beginners and experts alike share their experiences, troubleshoot issues, and celebrate successes.
Platforms like Reddit’s r/3Dprinting or the official forums of software like Cura are bustling hubs of activity. Don’t be shy about seeking help and advice – the 3D printing community is known for its welcoming nature and eagerness to assist newcomers. Post your questions, but remember to search first, as your issue might have already been solved.
As you grow more confident, pay it forward by sharing your own knowledge and expertise. Engaging in these communities not only solves immediate problems but also exposes you to new techniques, cutting-edge developments, and creative applications you might never have considered.
Remember, in the world of 3D printing, community knowledge is as valuable as the software itself.
YouTube channels and tutorials
In the visual world of 3D printing, YouTube channels and video tutorials are invaluable resources for mastering your software. These platforms offer a wealth of step-by-step guides, from basic operations to advanced techniques.
Channels like Maker’s Muse, 3D Printing Nerd, and CHEP provide in-depth tutorials on popular software like Cura and Simplify3D, often showcasing real-time problem-solving.
Don’t miss out on official channels of software developers, which often release videos explaining new features and software updates.
For beginners, playlist series that walk through the entire process from model creation to final print are particularly helpful.
As you progress, you’ll find specialized tutorials on topics like optimizing print settings or creating custom supports. Remember to check the video’s date to ensure you’re getting the most up-to-date information, especially when dealing with rapidly evolving software.
By regularly tuning into these channels, you’ll not only improve your software skills but also stay informed about the latest trends and innovations in the 3D printing world.
Books and guides
While online resources are fantastic, don’t overlook the power of books and comprehensive guides in your 3D printing software journey. These resources offer in-depth, structured learning that can complement your hands-on experience.
Look for titles that focus specifically on software usage, as they often provide systematic approaches to mastering complex features. Books like “3D Printing with Autodesk 123D®, Tinkercad®, and MakerBot®” or “Getting Started with 3D Printing: A Hands-on Guide to the Hardware, Software, and Services That Make the 3D Printing Ecosystem” offer valuable insights into various software platforms. Many of these guides are written by experienced authors and industry experts, providing you with tried-and-true techniques and insider tips.
E-books are particularly useful, as they’re often updated to keep pace with software changes. Don’t forget to check out software-specific guides, which dive deep into the nuances of your chosen platform.
While videos and forums are great for quick fixes, books and guides offer the depth needed to truly understand the principles behind 3D printing software.
By incorporating these resources into your learning routine, you’ll build a solid foundation of knowledge, setting you up for long-term success in your 3D printing endeavors.
Conclusion
As we wrap up our journey through 3D printing software for beginners, let’s recap the key points and takeaways.
From understanding different software types to troubleshooting common issues, we’ve covered essential ground. Remember, the right software can make all the difference in your 3D printing adventure. Let’s summarize our recommendations for beginners and set you on the path to success.
Final thoughts on 3D printing software for beginners
Embarking on your 3D printing journey is an exciting adventure, and choosing the right software is your first step towards success.
- Remember, the best 3D printing software for beginners balances user-friendliness with powerful features.
- Start with intuitive options like Cura, but don’t be afraid to explore more advanced tools as your skills grow.
- Keep in mind that mastering 3D printing software is a gradual process – patience and practice are your best allies.
- Leverage online communities, tutorials, and resources to continually expand your knowledge.
- Don’t get discouraged by initial challenges; every failed print is a learning opportunity. As you progress, experiment with different settings and features to understand their impact on your prints.
Most importantly, enjoy the process! 3D printing is a blend of technology and creativity, offering endless possibilities for innovation. Whether you’re printing functional parts or artistic creations, the right software will be your trusty companion in bringing your ideas to life.
So, dive in, start experimenting, and watch your 3D printing skills soar!